DIM für Fortgeschrittene / DIM for advanced users
(gültig für DAZ 4.22 - valid for DAZ 4.22)
1. DIM Vorschau-Icons aktivieren / activating the preview-icons:
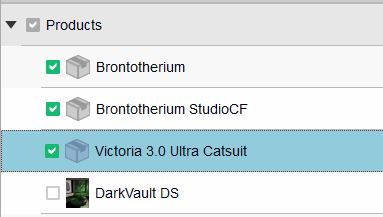
Als erstes die Chexboxen aktivieren, von denen man die Vorschaubilder
haben möchte. Es können auch "alle"
angewählt werden.
First, activate the checkboxes of which you want to have the preview
images. “All” can also be selected.
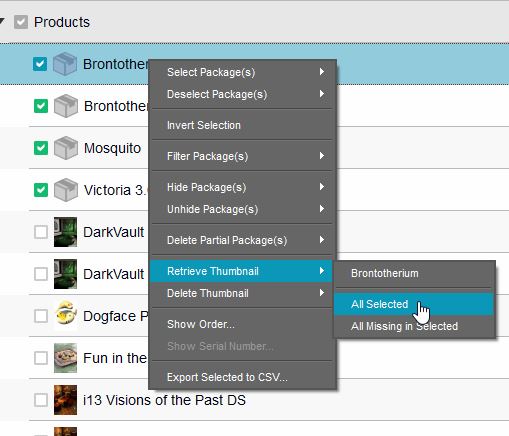
Dann mit der rechten Maustaste auf einen beliebigen Eintrag klicken und
"Retrieve Thumbnail - All Selected" auswählen:
Then right-click on any entry and select "Retrieve Thumbnail - All
Selected":
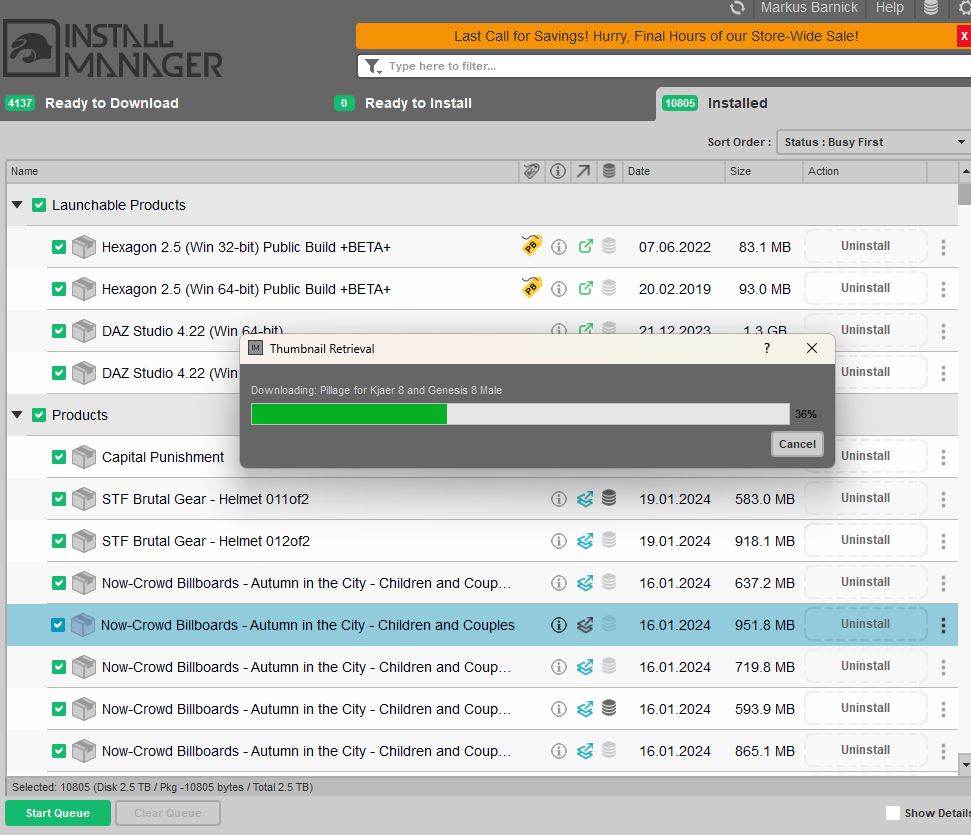
Dann geht es los. Beim ersten Mal, wenn man "alle" ausgewählt
hat, kann das länger dauern.
Then it starts. The first time you select "all" it may take longer.
Die Prozedur muss sowohl für die "Ready to download" als auch
für die "Installed Files" durchgeführt werden.
The procedure must be carried out for both the “Ready to
download” and the “Installed Files”.
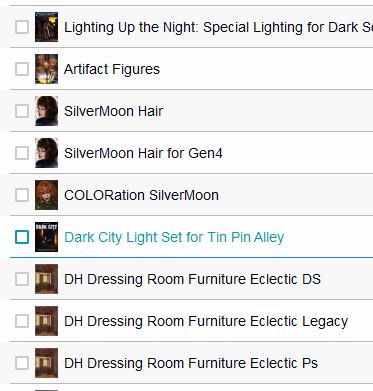
Anschließend sind die Thumbs sichtbar:
The thumbs are then visible:
2. DIM Protokoll einsehen - View the protocoll
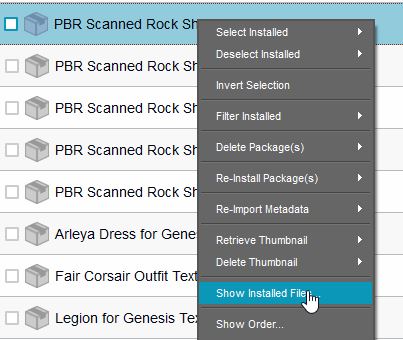
Das geht logischerweise nur im "Installed-Tab". Rechte Maustaste auf einen Eintrag und dann auf "Show installed files".
Logically, this is only possible in the “Installed tab”.
Right click on an entry and then click on “Show installed
files”.
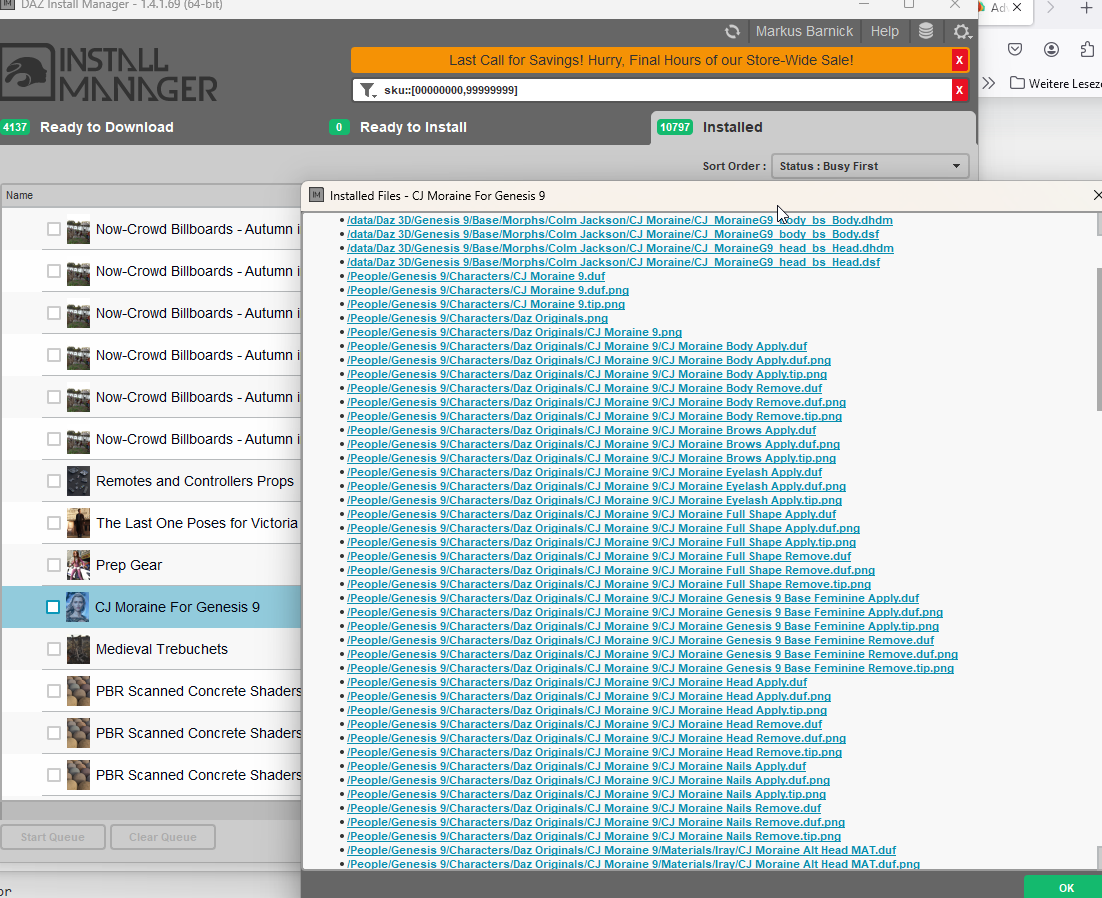
und schon sieht man wo der DIM das Zeug installiert hat:
and you can see where the DIM has installed the stuff:
3. Die Filter setzen. Setting the filters
Voraussetzungen / Requirements:
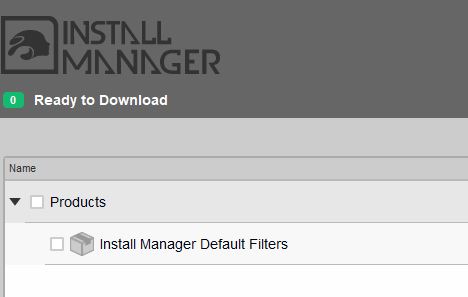
Die Install Manager Default Filters müssen installiert sein. The filters must be installed.
Wenn du oben links auf das Filter-Symbol klickst, müsste folgende Auswahl erscheinen:
When you are clicking on the filter-icon, the following list should appear:
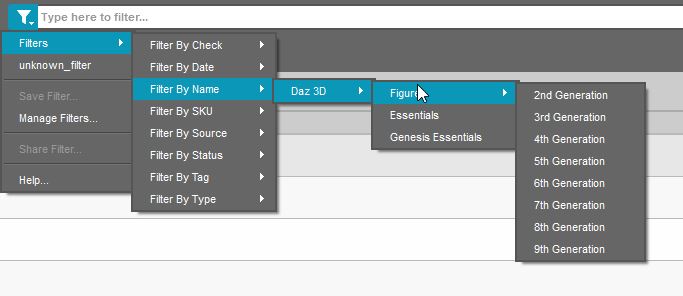
Leider funktioniert das manchmal nicht. Unfortunately sometimes this doesn't work.
Es erscheint nur diese Ansicht. Only this view appears:
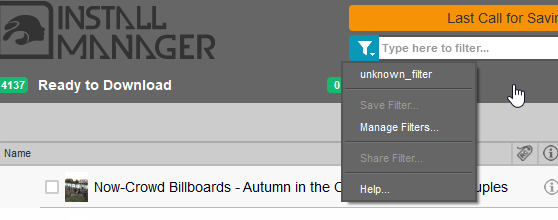
Falls das passiert, dann klicke hier auf "Manage Filters". Du landest
dann in einem Verzeichnis, das ungefähr so aussieht (hier die
Ansicht auf meinem Rechner) :
If this happens, click here on “Manage Filters”. You will
then end up in a directory that looks something like this (here is the
view on my computer):
C:\Users\Marku\AppData\Roaming\DAZ 3D\InstallManager\UserAccounts\Markus%20Barnick
Öffne die ZIP-Datei / Open the zip-file IM00014811-02_InstallManagerDefaultFilters.zip
und gehe in der Zip-Datei in folgenden Ordner / and go to the following folder in the zip file:
IM00014811-02_InstallManagerDefaultFilters.zip\SharedDocs\DAZ 3D\InstallManager\
Kopiere den Ordner "Filters" in obiges Verzeichnis / copy the folder "filters" into the directory writen above:

Zusätzlich kopiere eine Datei mit dem Namen InstallManagerDefaultFilters.dsx in das gleiche Verzeichnis:
additionally copy a file named InstallManagerDefaultFilters.dsx in the same directory.
<?xml version="1.0" encoding="UTF-8"?>
<ProductSupplement VERSION="0.1">
<ProductName VALUE="Install Manager Default Filters"/>
<ProductStoreIDX VALUE="14811-2"/>
<UserOrderDate VALUE="2013-04-05T11:19:29Z"/>
<InstallerDate VALUE="2023-06-12T15:34:42Z"/>
<ProductFileGuid VALUE="455b33bc-d94a-97d2-6fcf-30ae0ffb2a5d"/>
<InstallTypes VALUE="Plugin"/>
<ProductTags VALUE="InstallManager,Plugin"/>
</ProductSupplement>
DIM neu starten / DIM restarting
Wenn du jetzt auf das Filter - Icon klickst sollte die Ansicht so aussehen:
If you now click on the filter icon, the view should look like this:

4. Die gleichen Filter im SmartContent installieren / Install the same filters in SmartContent
im SmartContent auf das Lupensymbol und dann auf "Manage Filters" klicken.
Click on the magnifying glass icon in SmartContent and then click on “Manage Filters”.
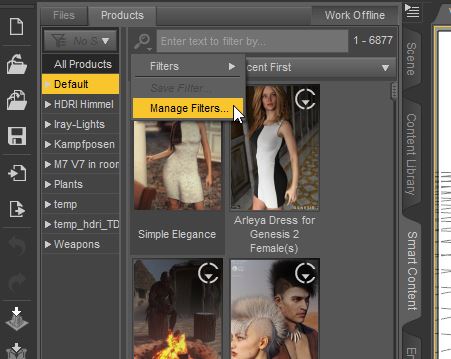
Es öffnet sich ein Verzeichnis, ähnlich diesem / a directory is opening, similar to this:
C:\Users\Marku\AppData\Roaming\DAZ 3D\Studio4 Public Build\resources\Filters\Products
Kopiere dort wieder die Datei InstallManagerDefaultFilters.dsx und das
Filter-Verzeichns mitsamt Unterverzeichnissen vom DIM - Ordner - siehe
oben - hinein.
Copy the file InstallManagerDefaultFilters.dsx and the filter directory
including subdirectories from the DIM folder - see above - into it.
Wenn du jetzt auf die Lupe klickst sollte Folgendes erscheinen / if you
are now clicking on the magnifying glass-icon, it should look like this now:
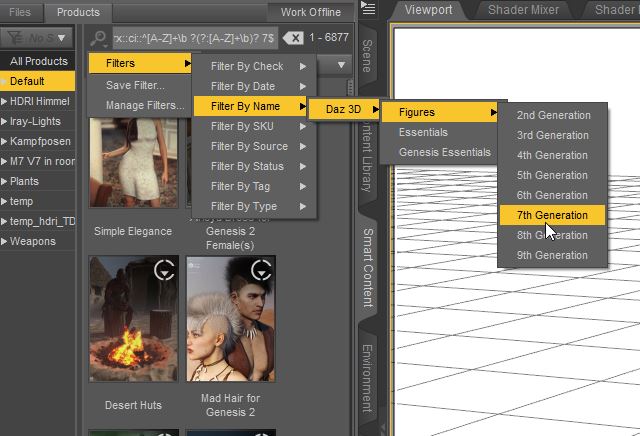
Leider funktioniert bei mir die Suche nach Figuren / Namen nicht.
Vielleicht weiß jemand, woran das liegt. Der Rest funktioniert.
Unfortunately the search for characters/names doesn't work for me. Maybe someone knows what's causing this. The rest works.
5. Abschließender Hinweis / Final note:
in den Dateien stehen nur Anweisungen in der Form regulärer Ausdrücke.
Hier für Genesis 9: rx::ci::^[A-Z]+\b ?(?:[A-Z]+\b)? 9(?:\.\d+)?(?: HD)?$
Wer sich die Dateien anschaut und die Logik versteht, kann u.U. eigene Filter programmieren.
Man kann sich diese Ausdrücke übrigens gut von ChatCPT - chat.openai.com erklären lassen.
The files only contain statements in the form of regular expressions.
Here for Genesis 9: rx::ci::^[A-Z]+\b ?(?:[A-Z]+\b)? 9(?:\.\d+)?(?: HD)?$
If you look at the files and understand the logic, you may be able to program your own filters.
By the way, these expressions can be well explained by ChatCPT - chat.openai.com.
Viel Spaß / Have fun :-)


